Today, I’m sharing some tips for how to measure yourself and select your size of the Dana Jumpsuit pattern. First, I’ll show you how to measure yourself, and then we’ll take a look at the size chart and go through the process of selecting your size. Watch the video above for lots of details, plus some light comedy when I attempt to measure my torso with a too short measuring tape.
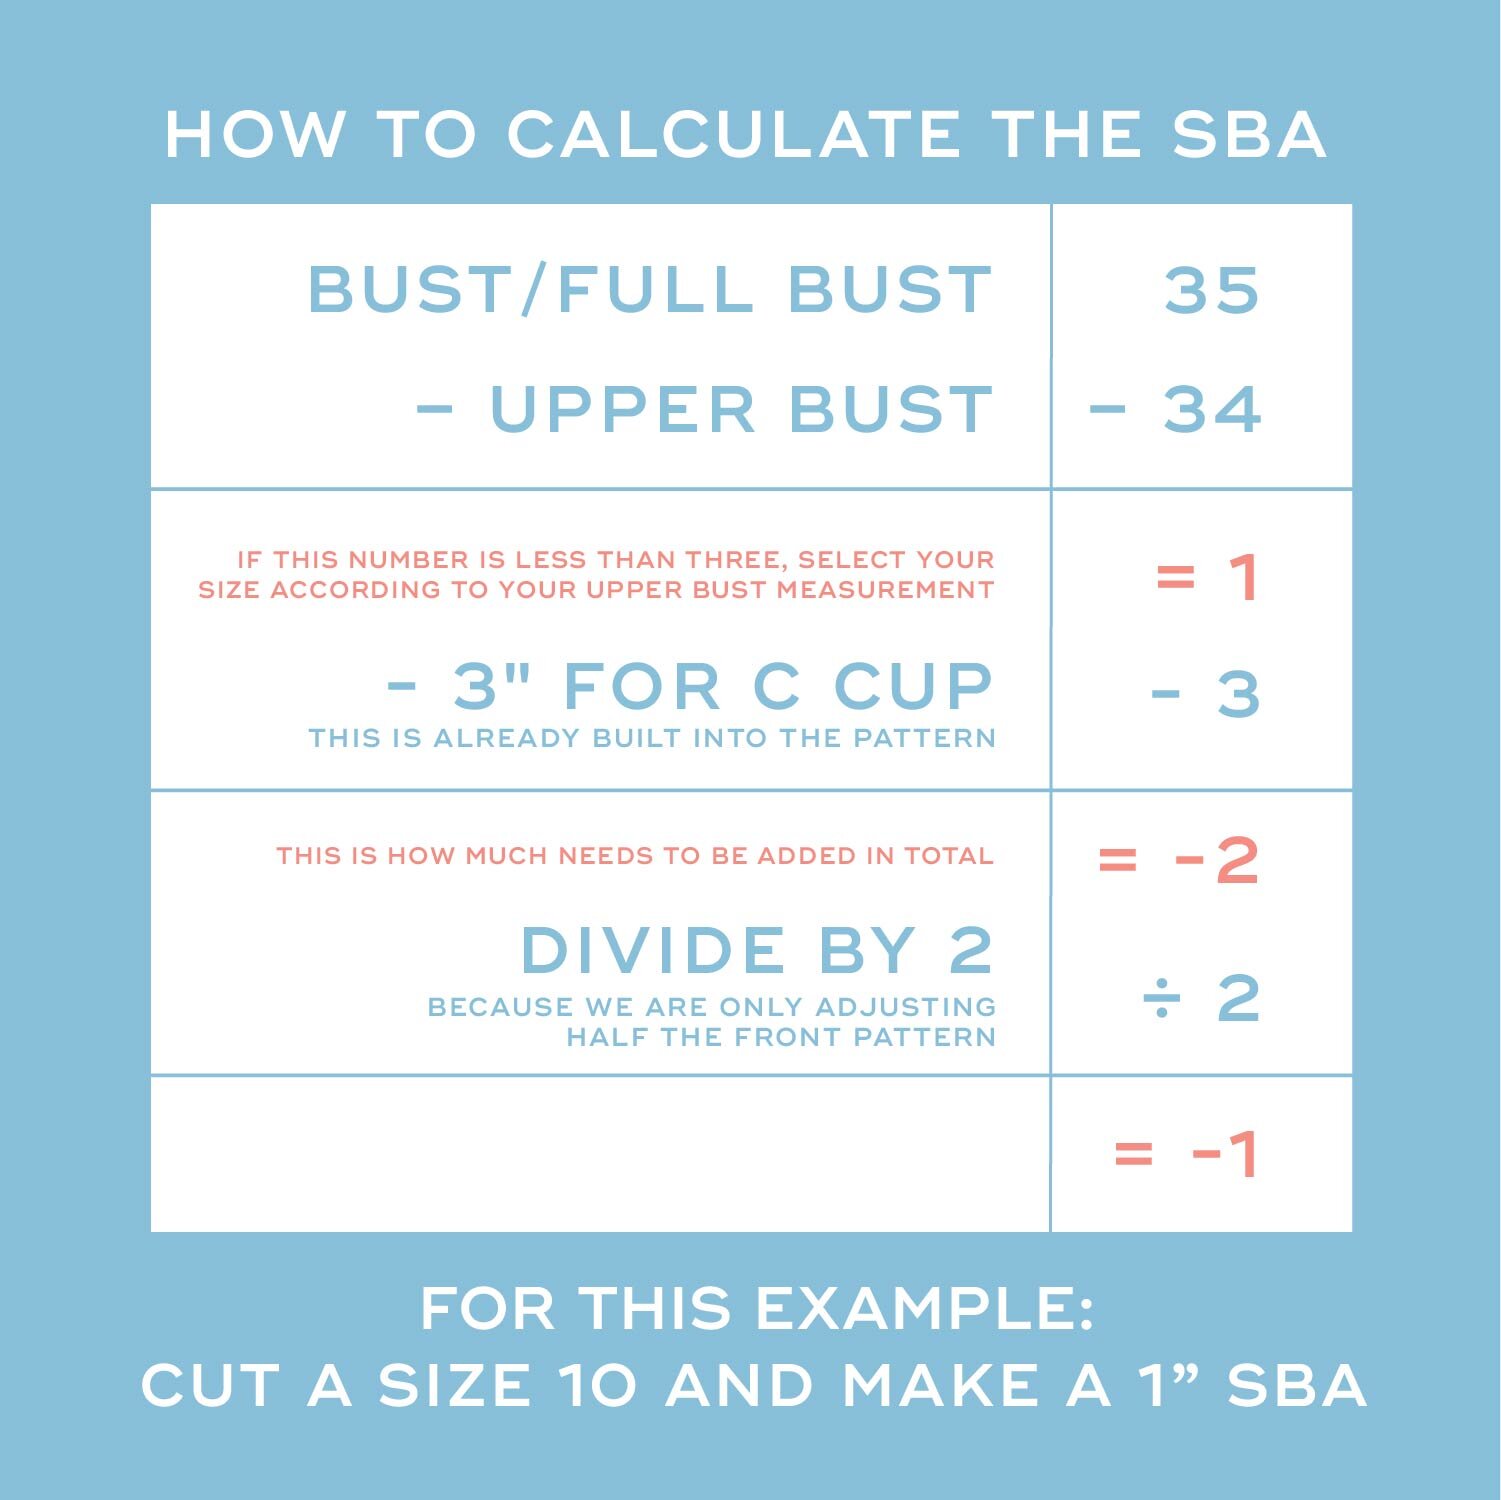
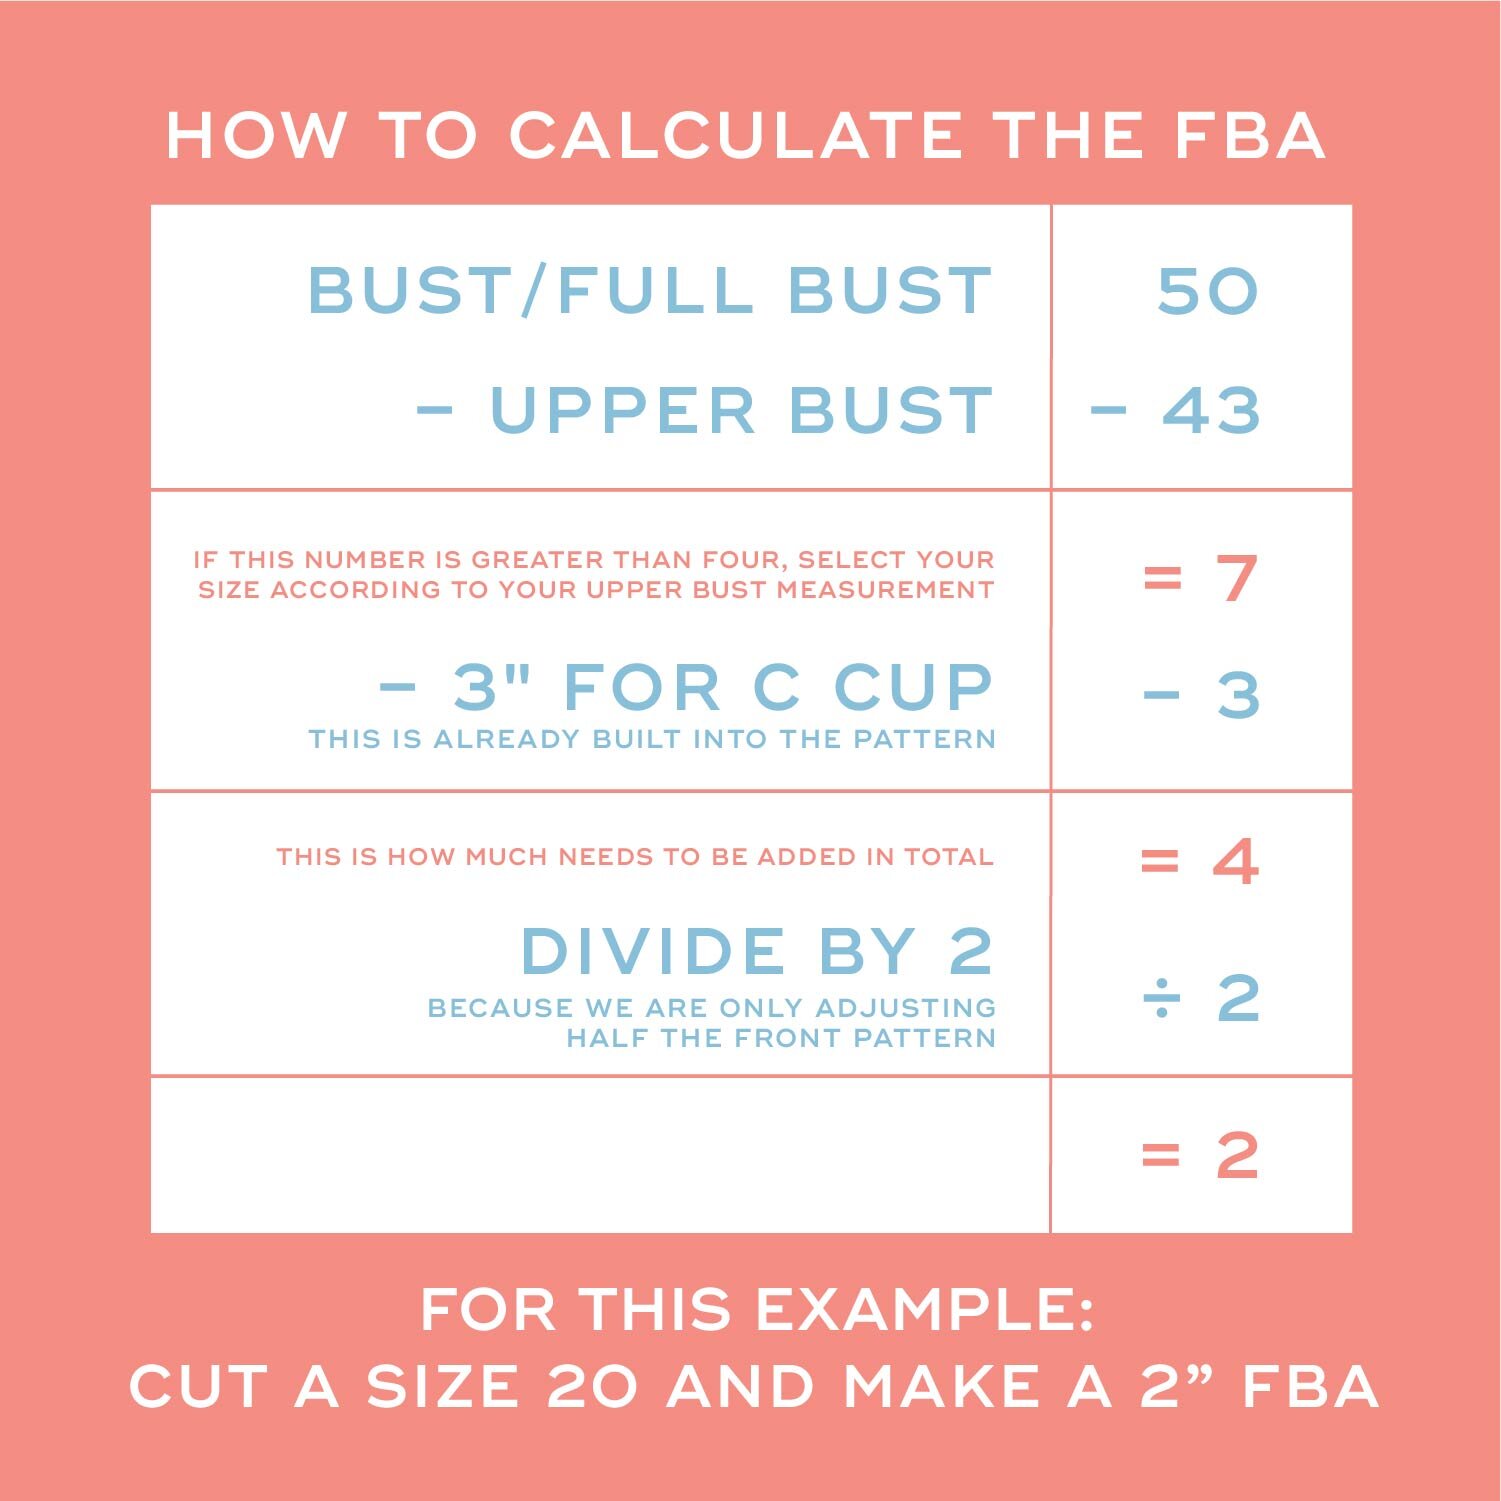
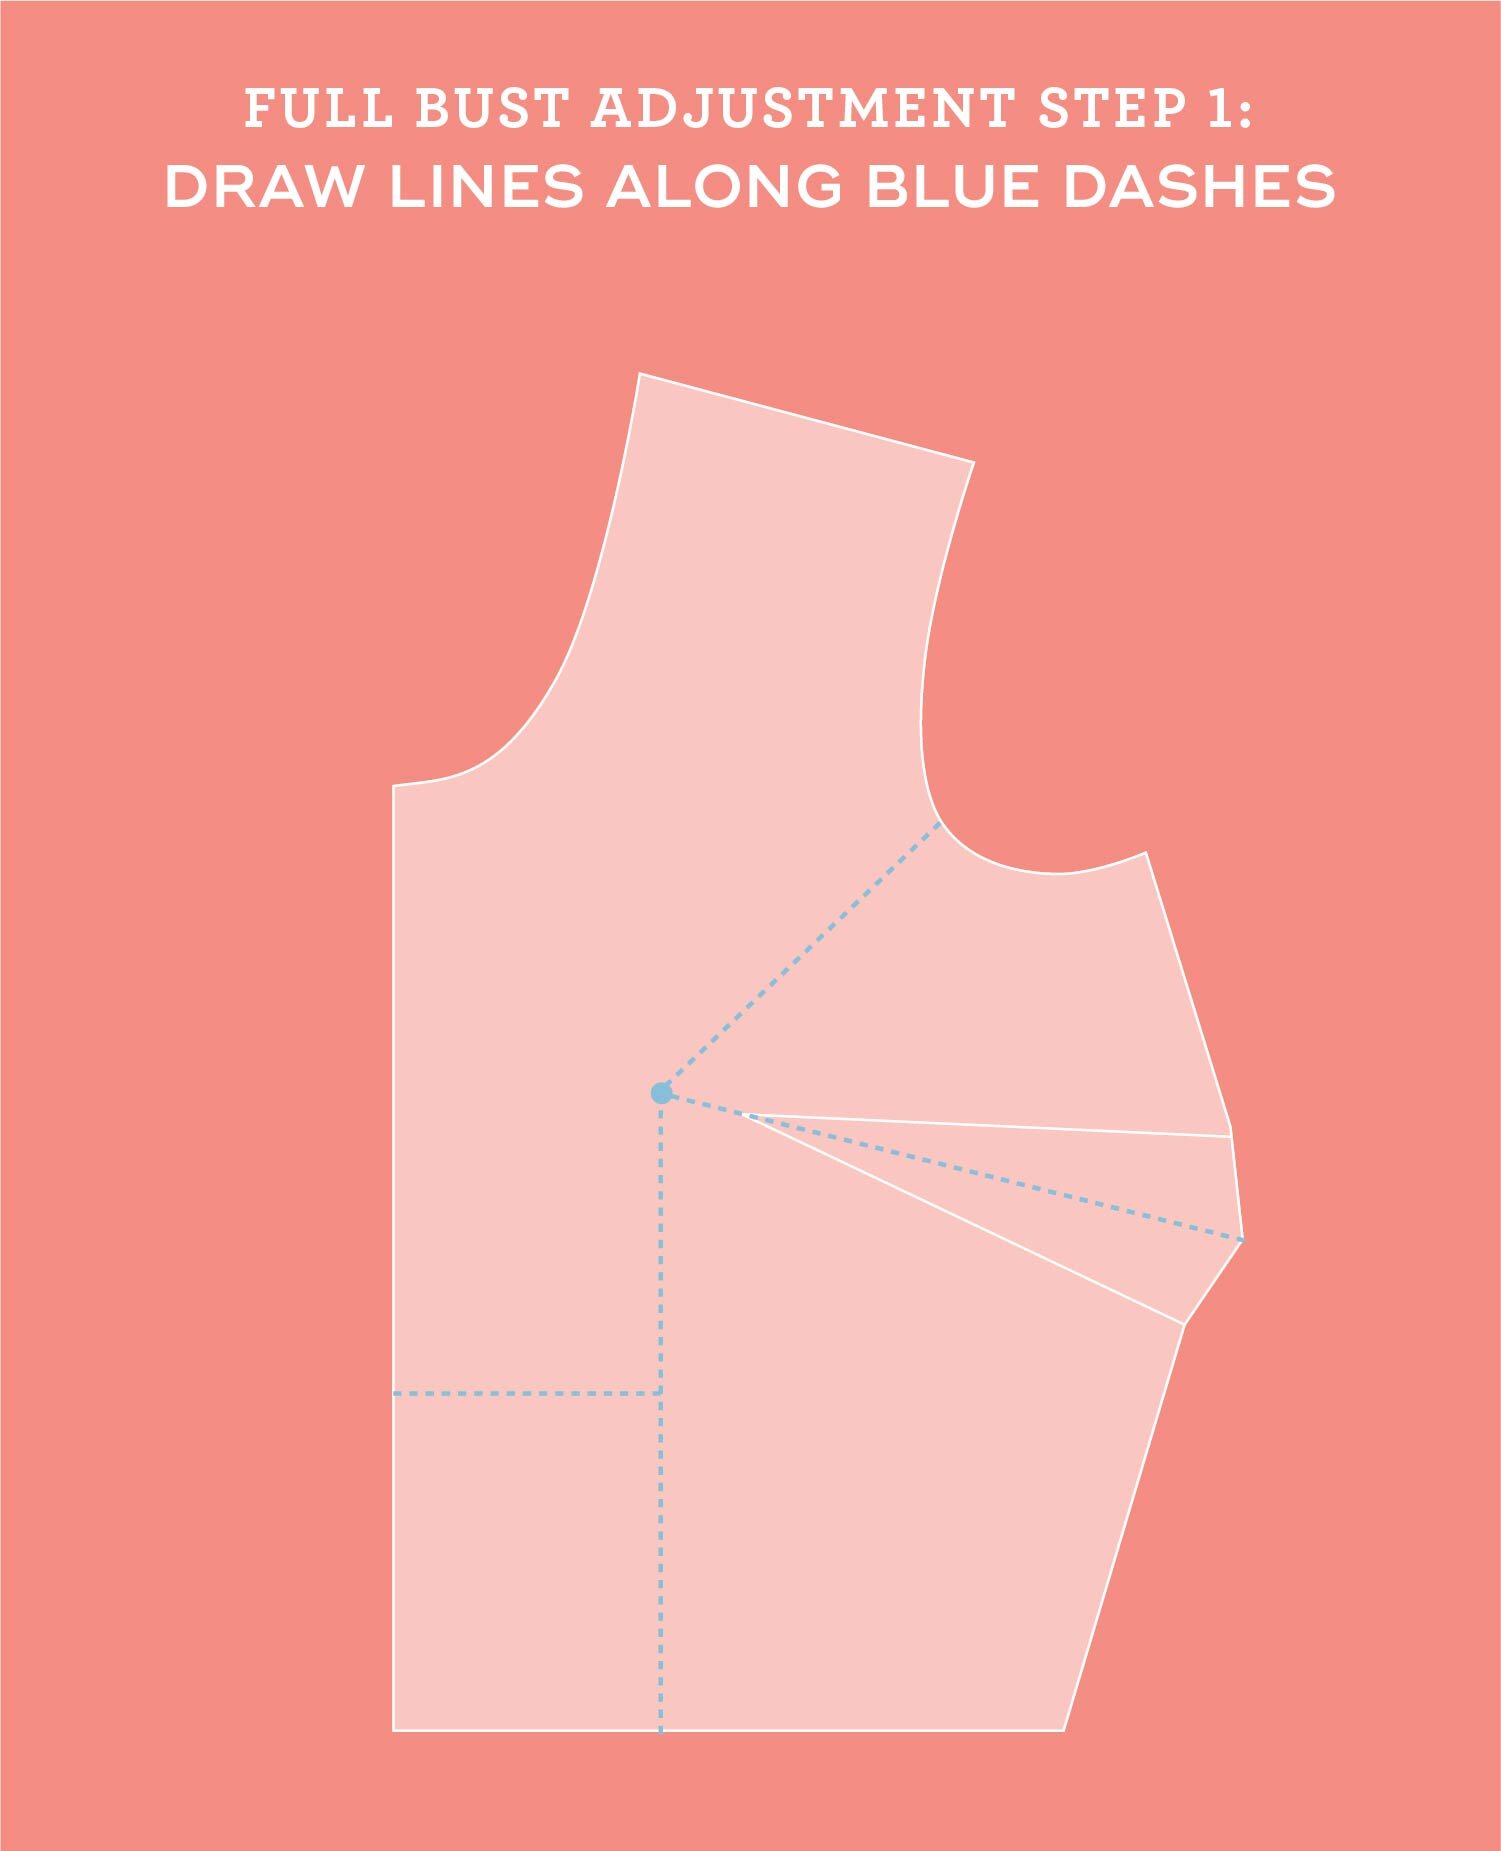
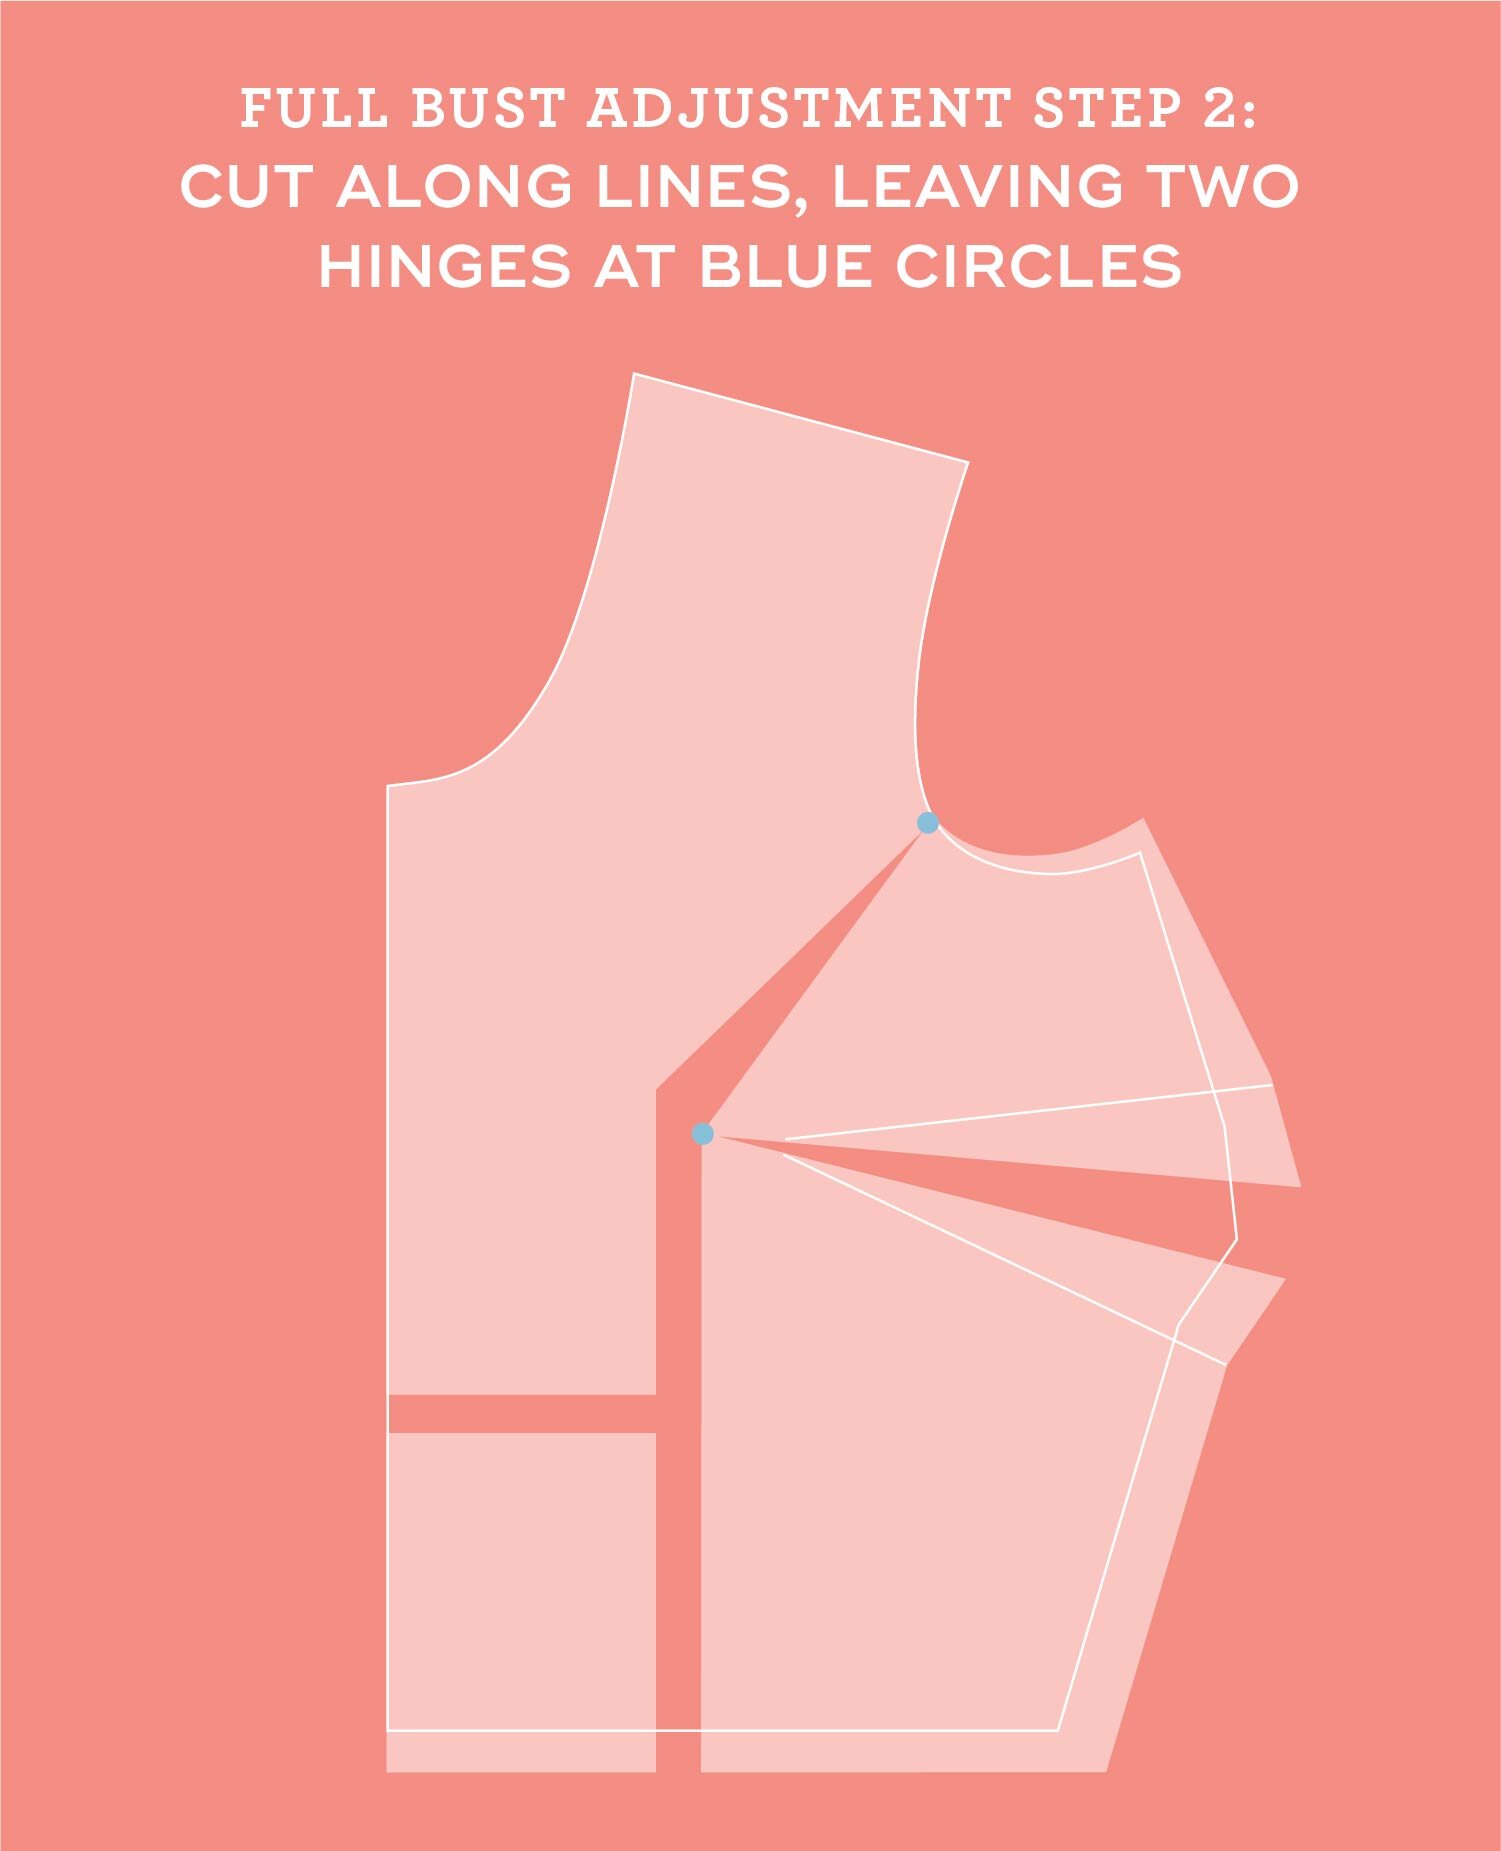
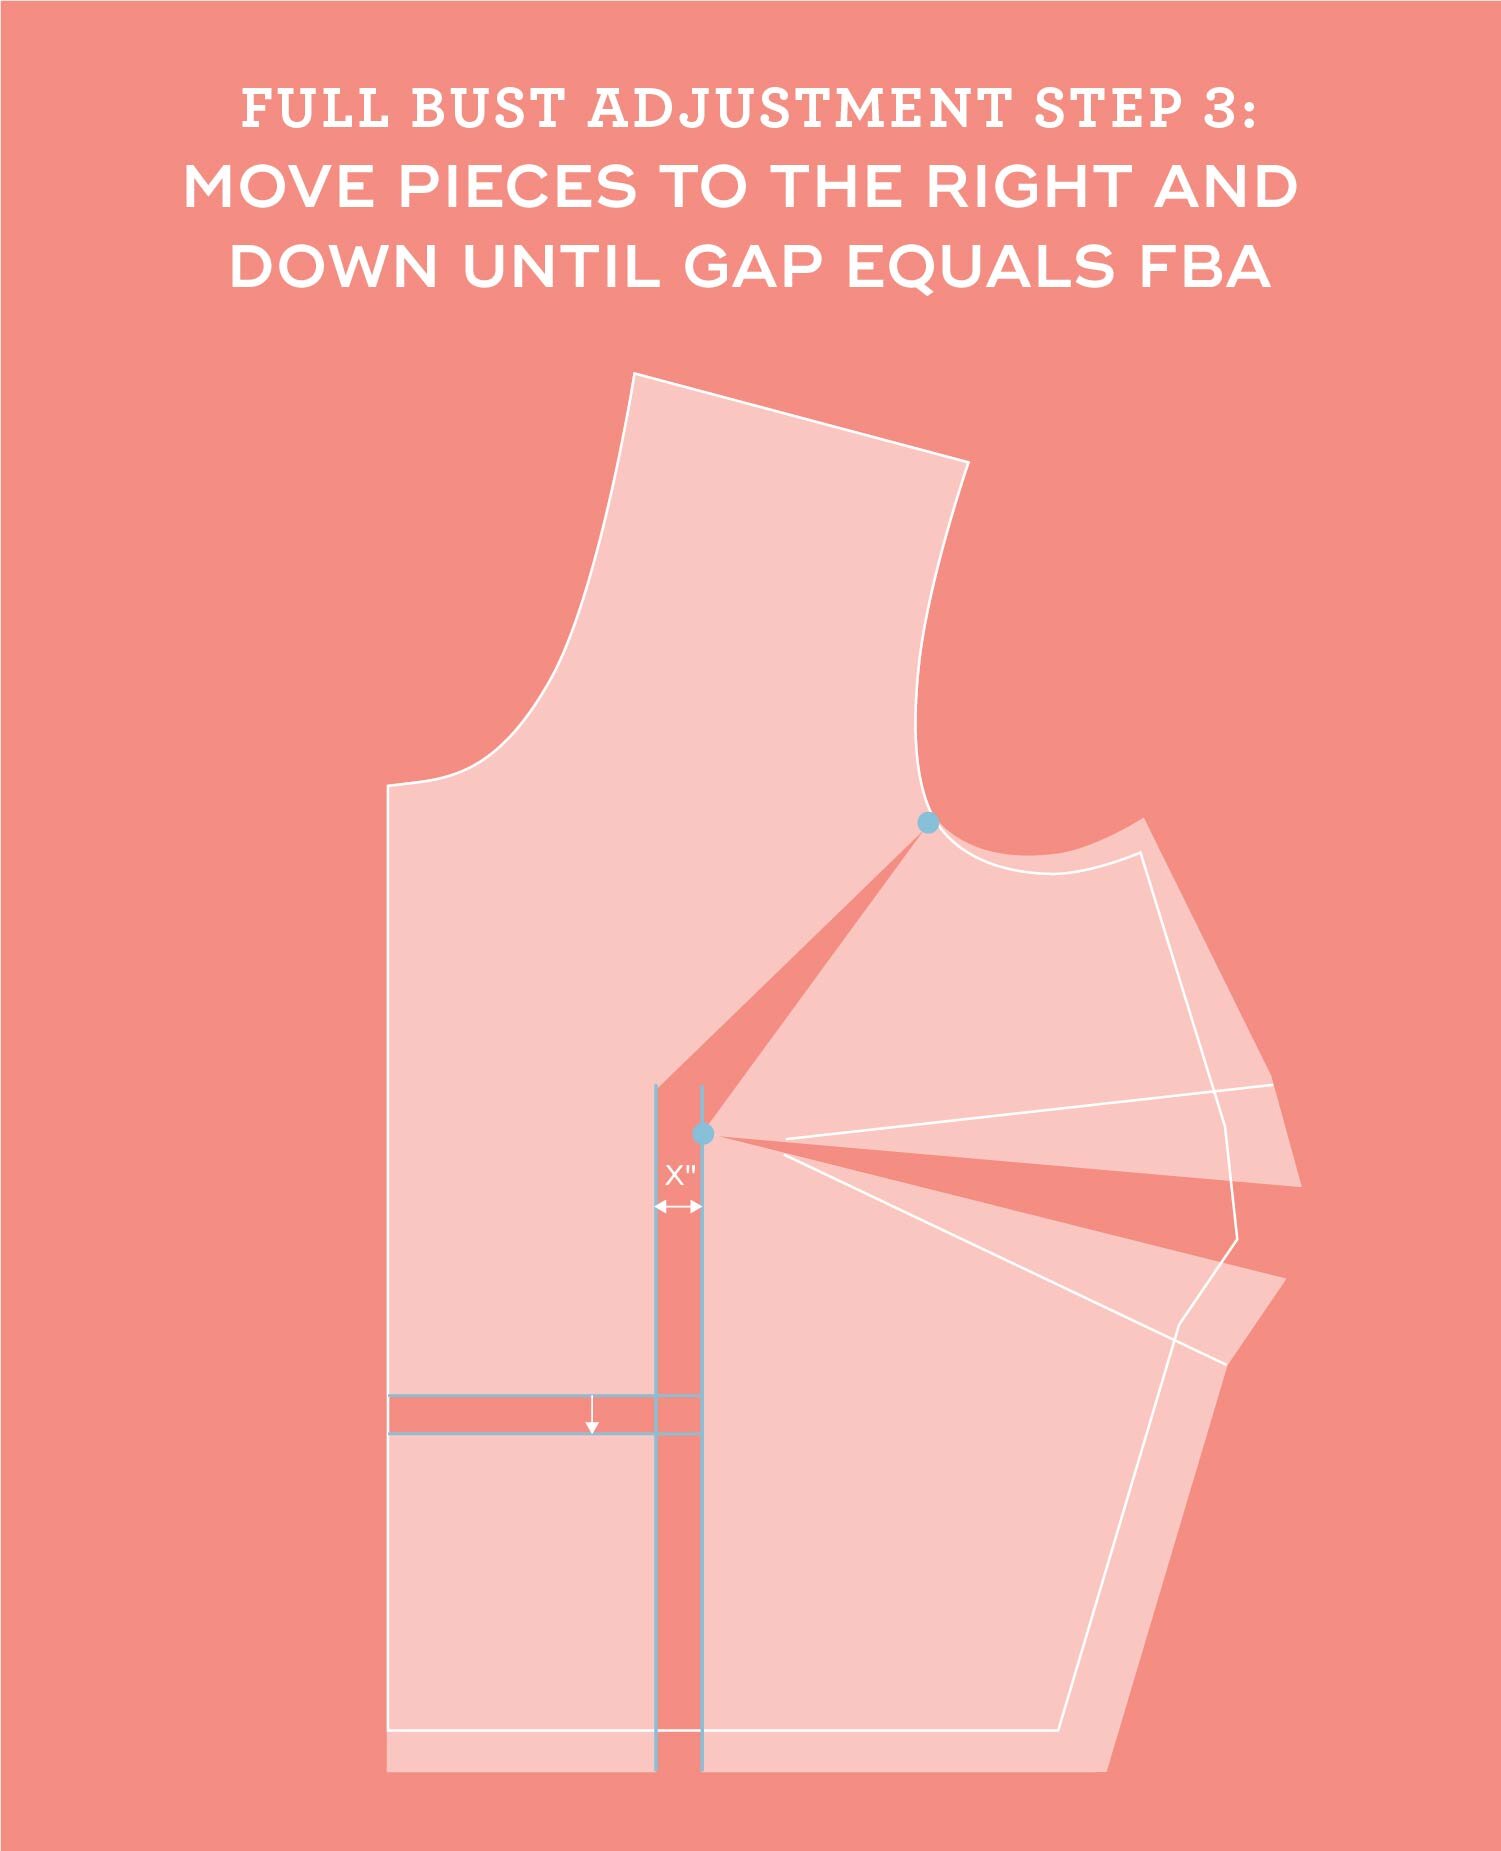
How to calculate your SBA/FBA
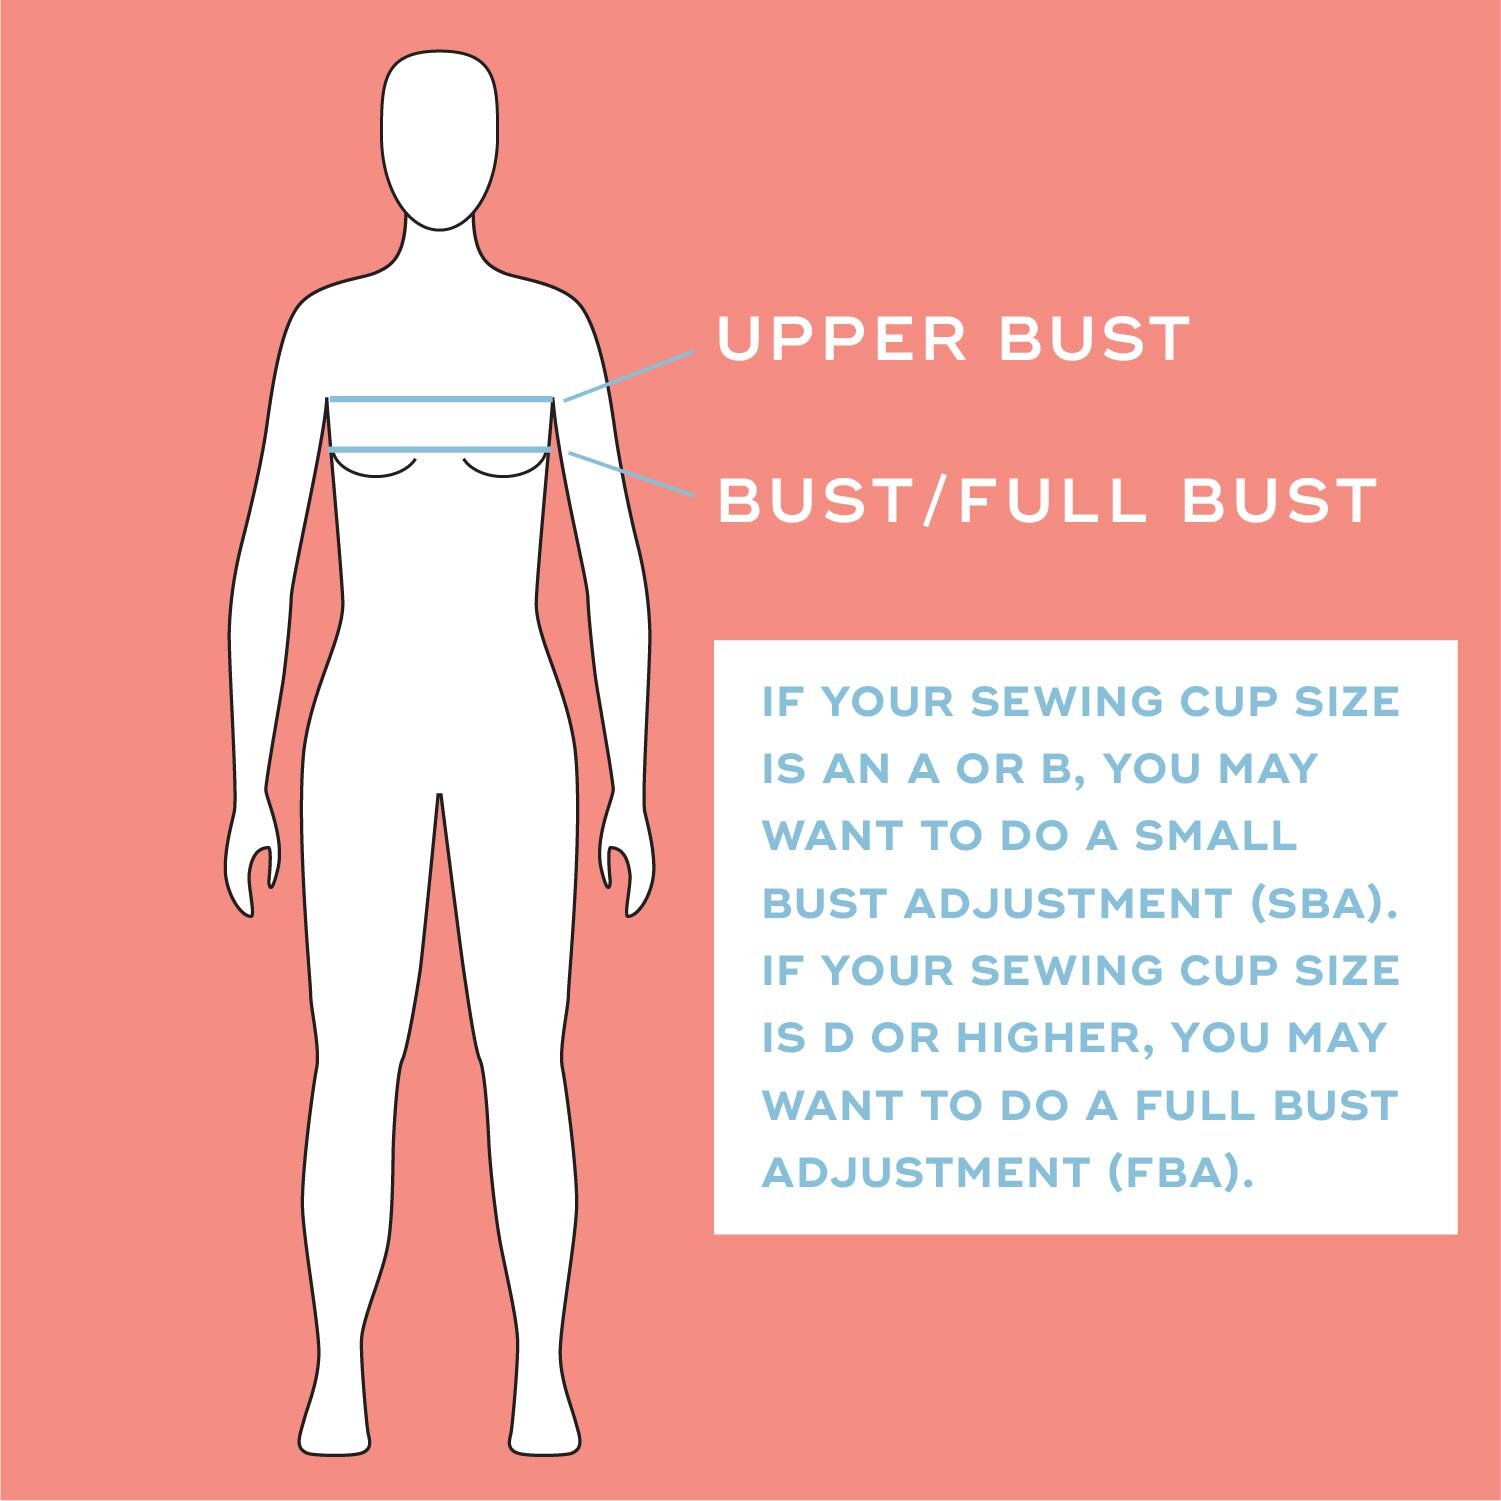
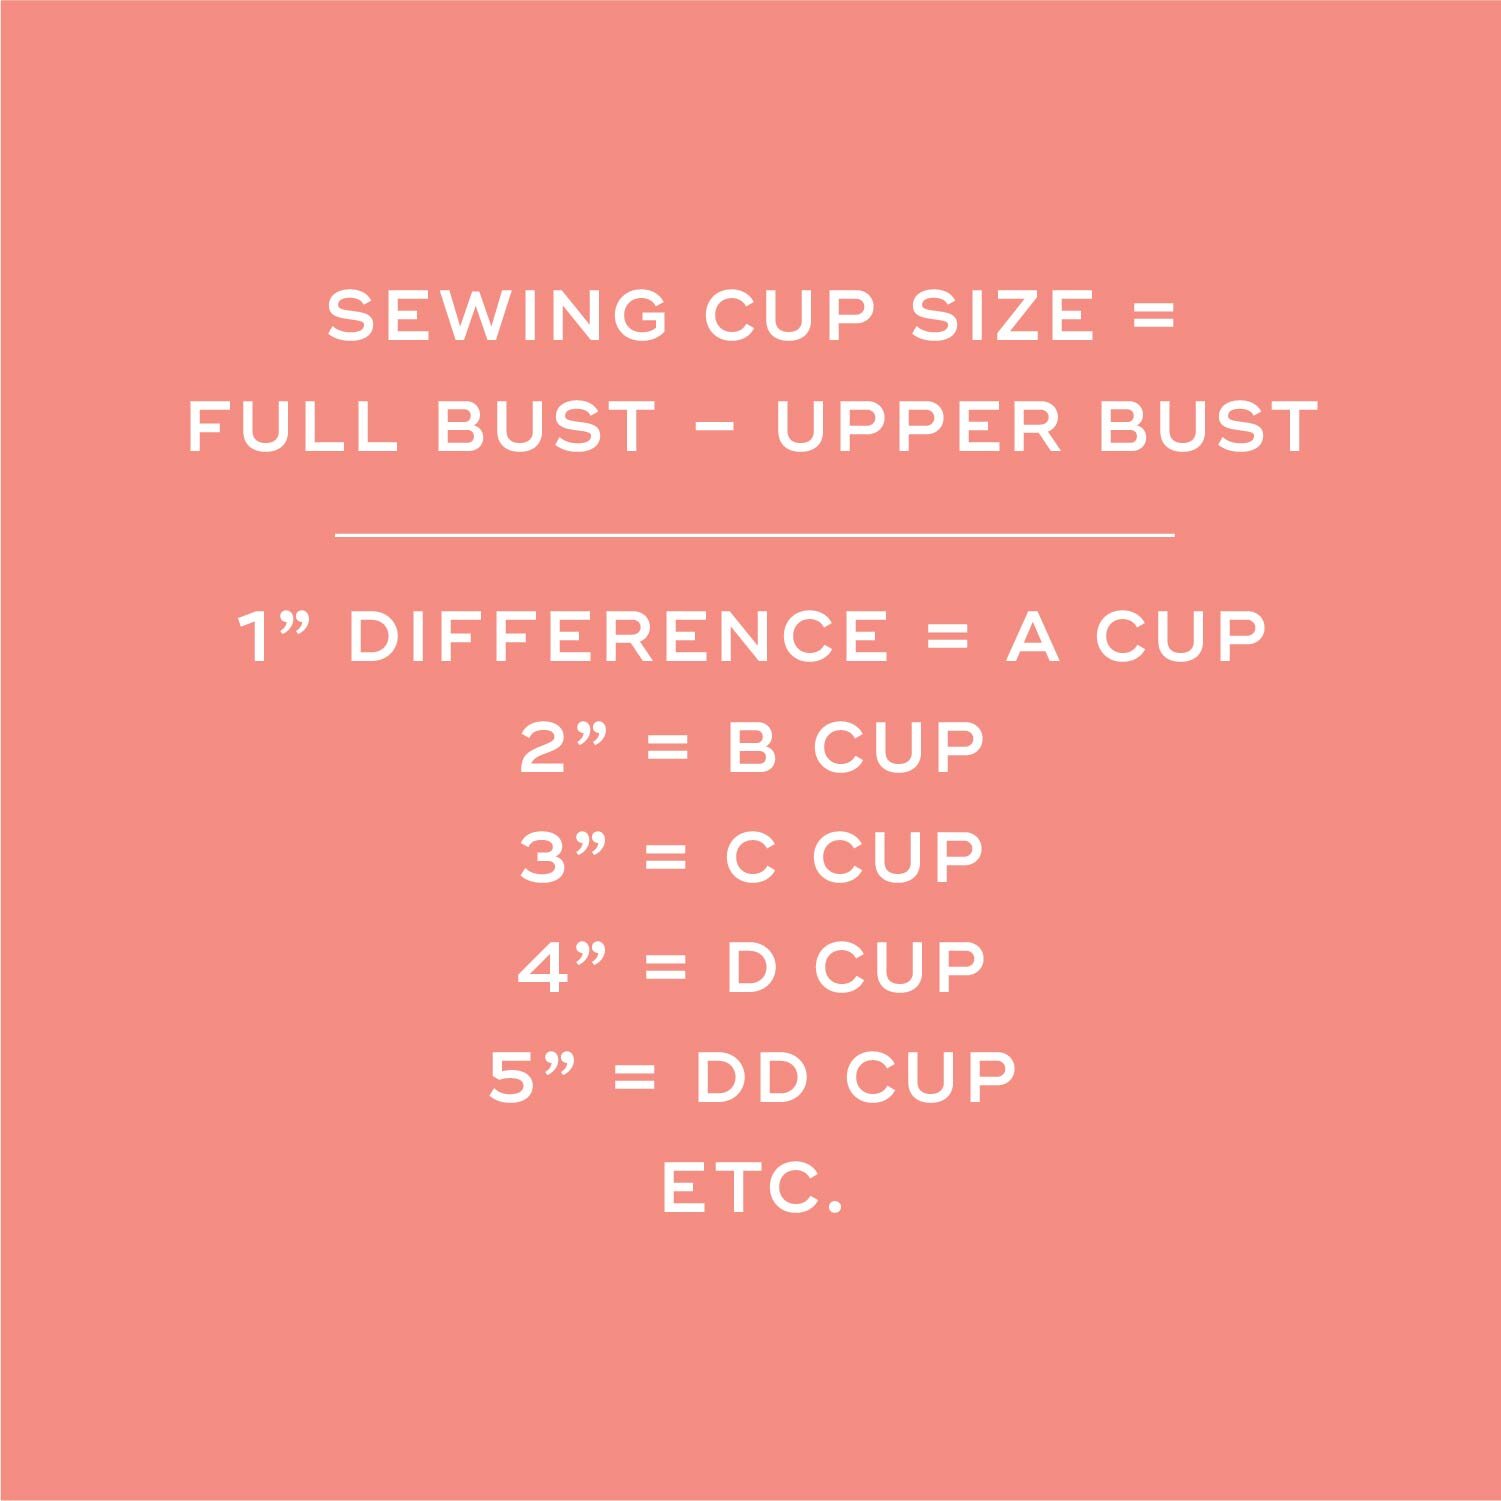
Your "Sewing cup size” is the difference between your upper bust and full bust measurements.
1” difference = A cup
2” = B cup
3” = C cup
4” = D cup
5” = DD cup
etc.
For example, if your upper bust is 35” and your full bust is 39”, then your sewing cup size is a D cup.
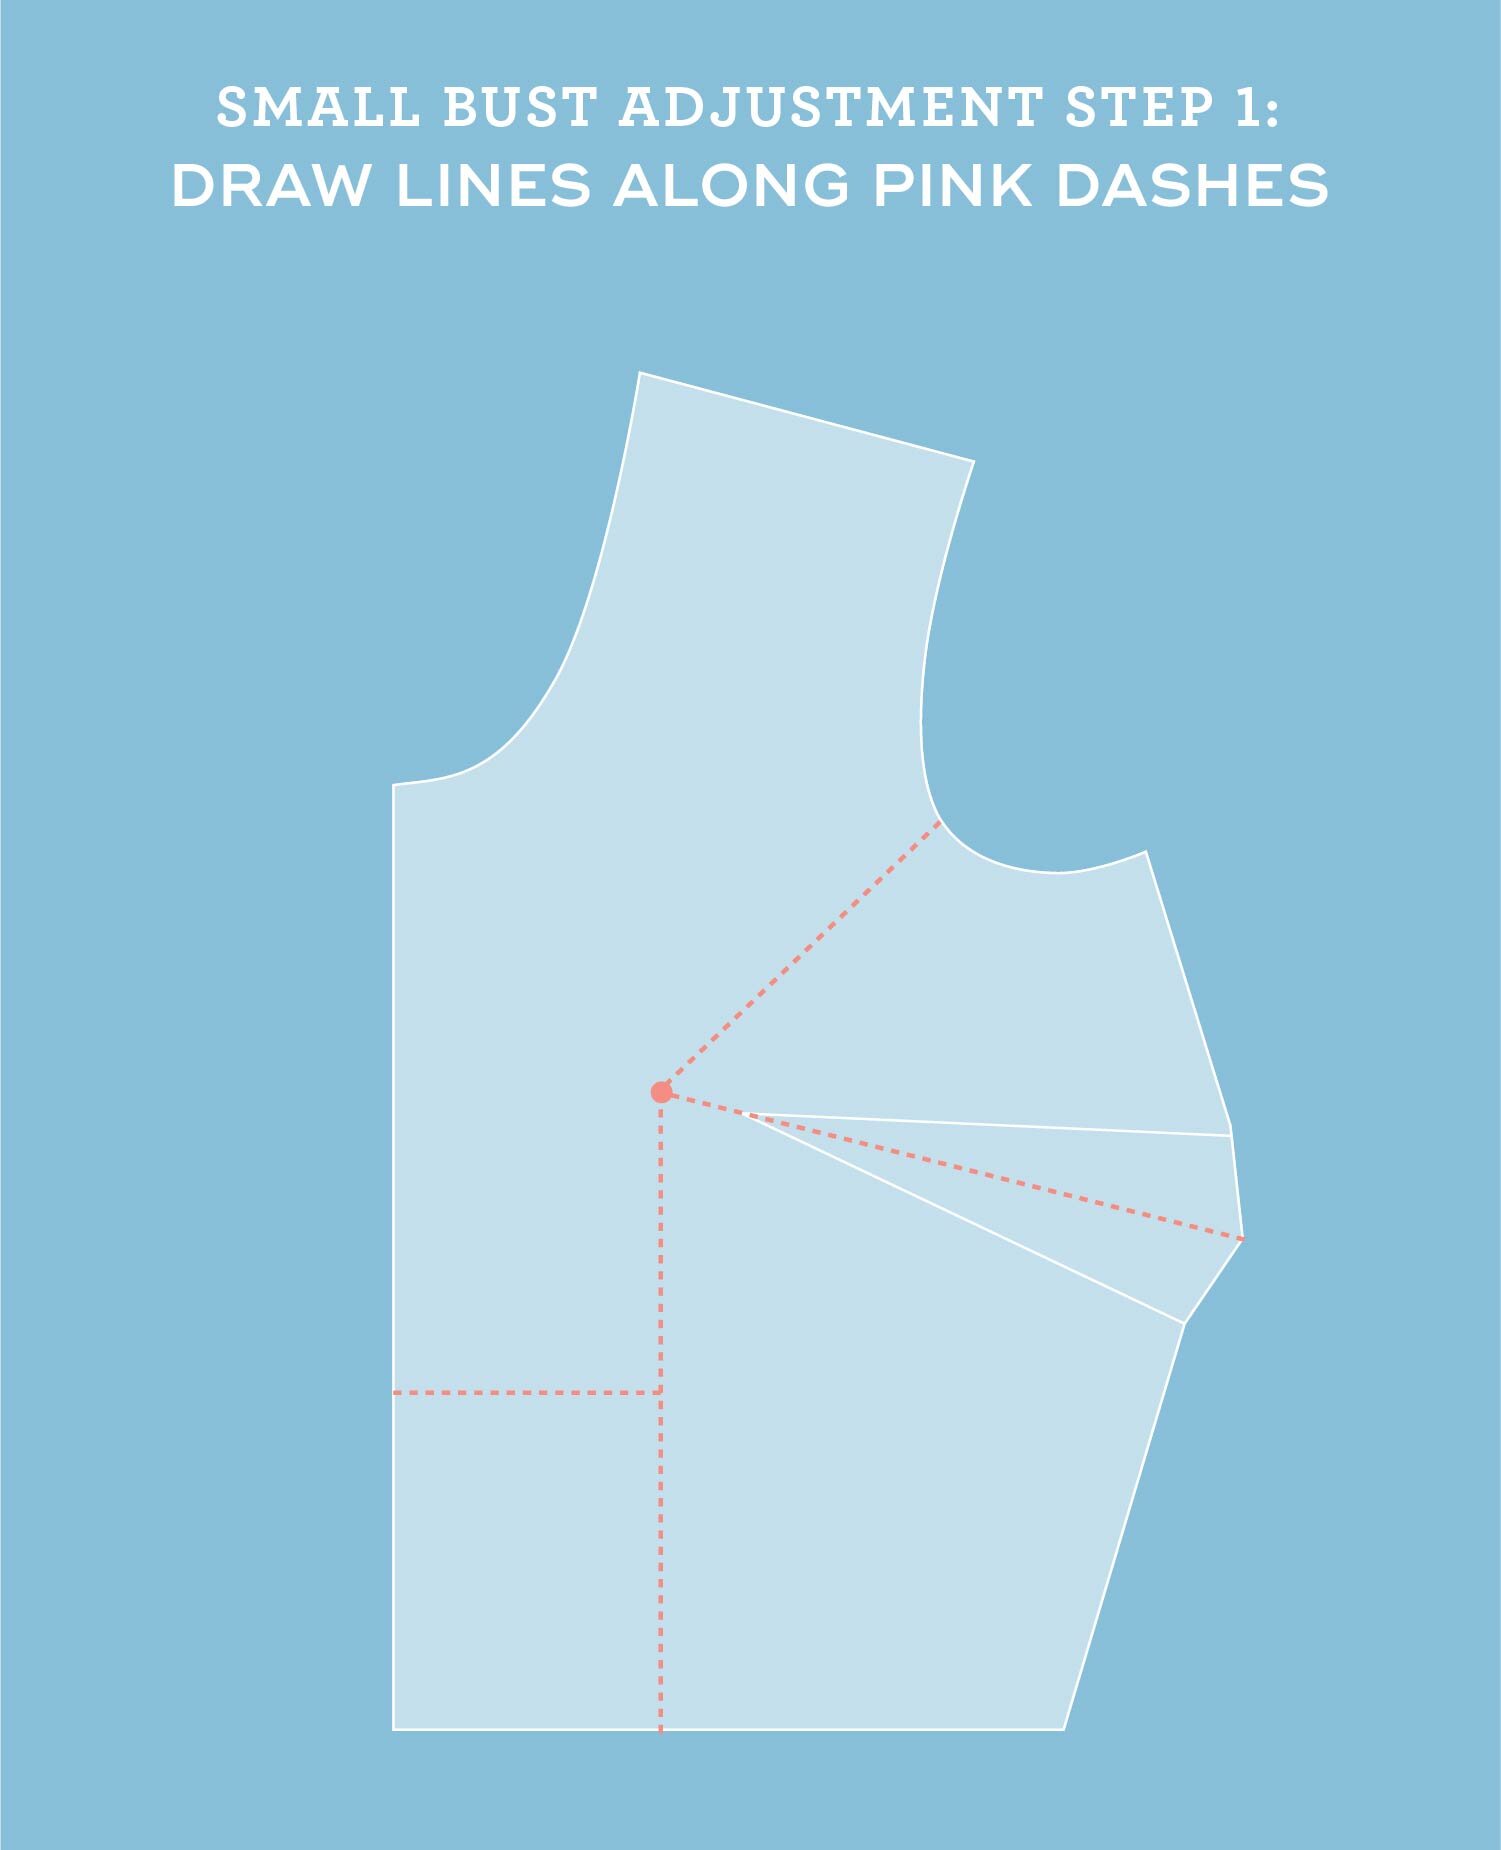
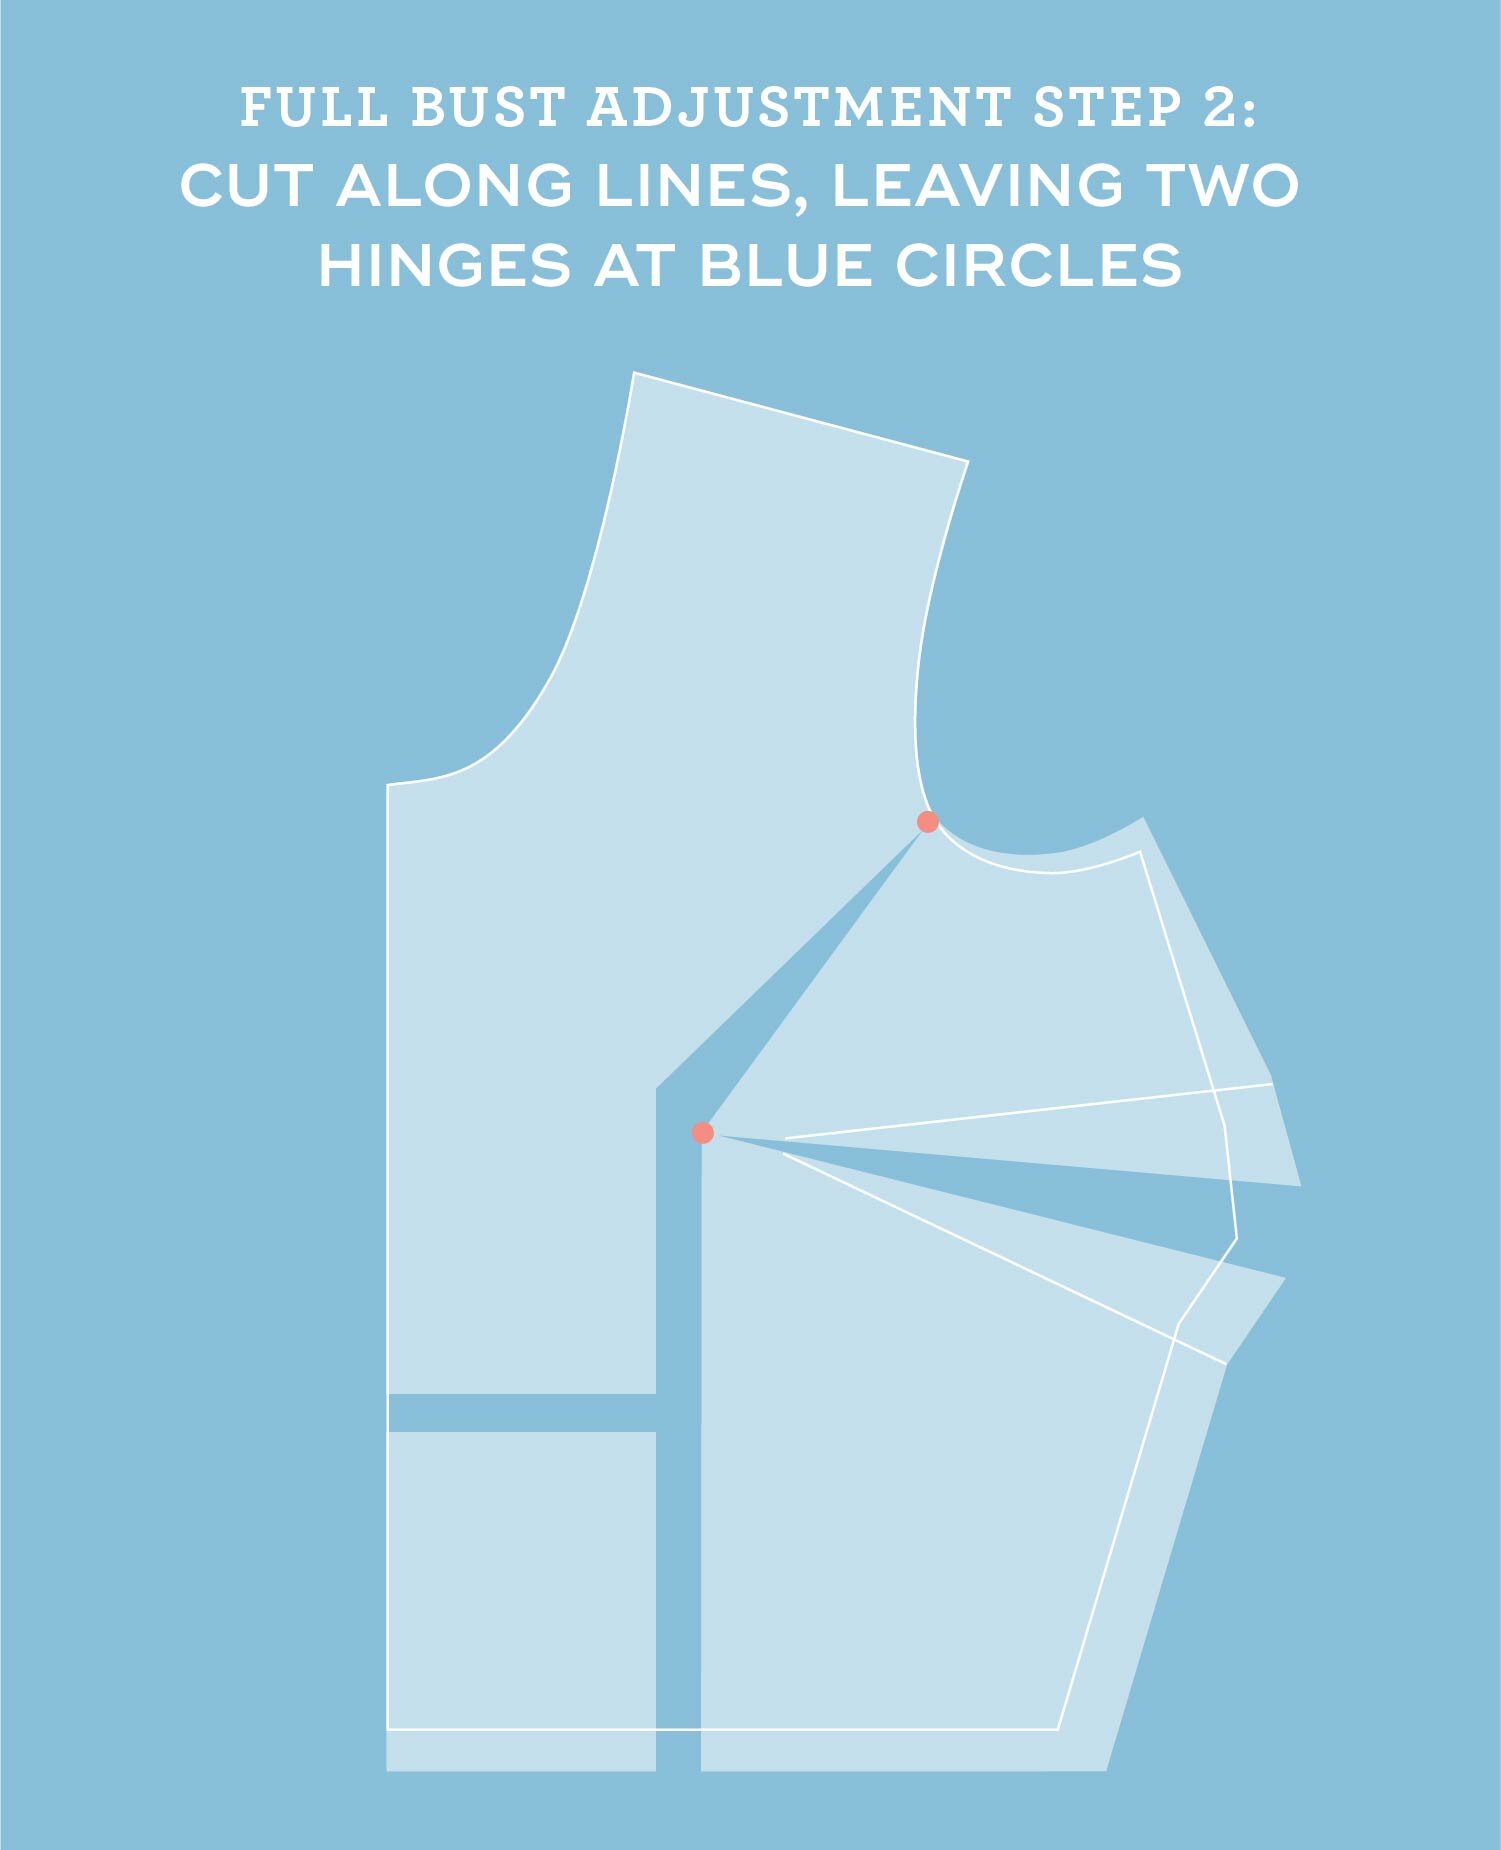
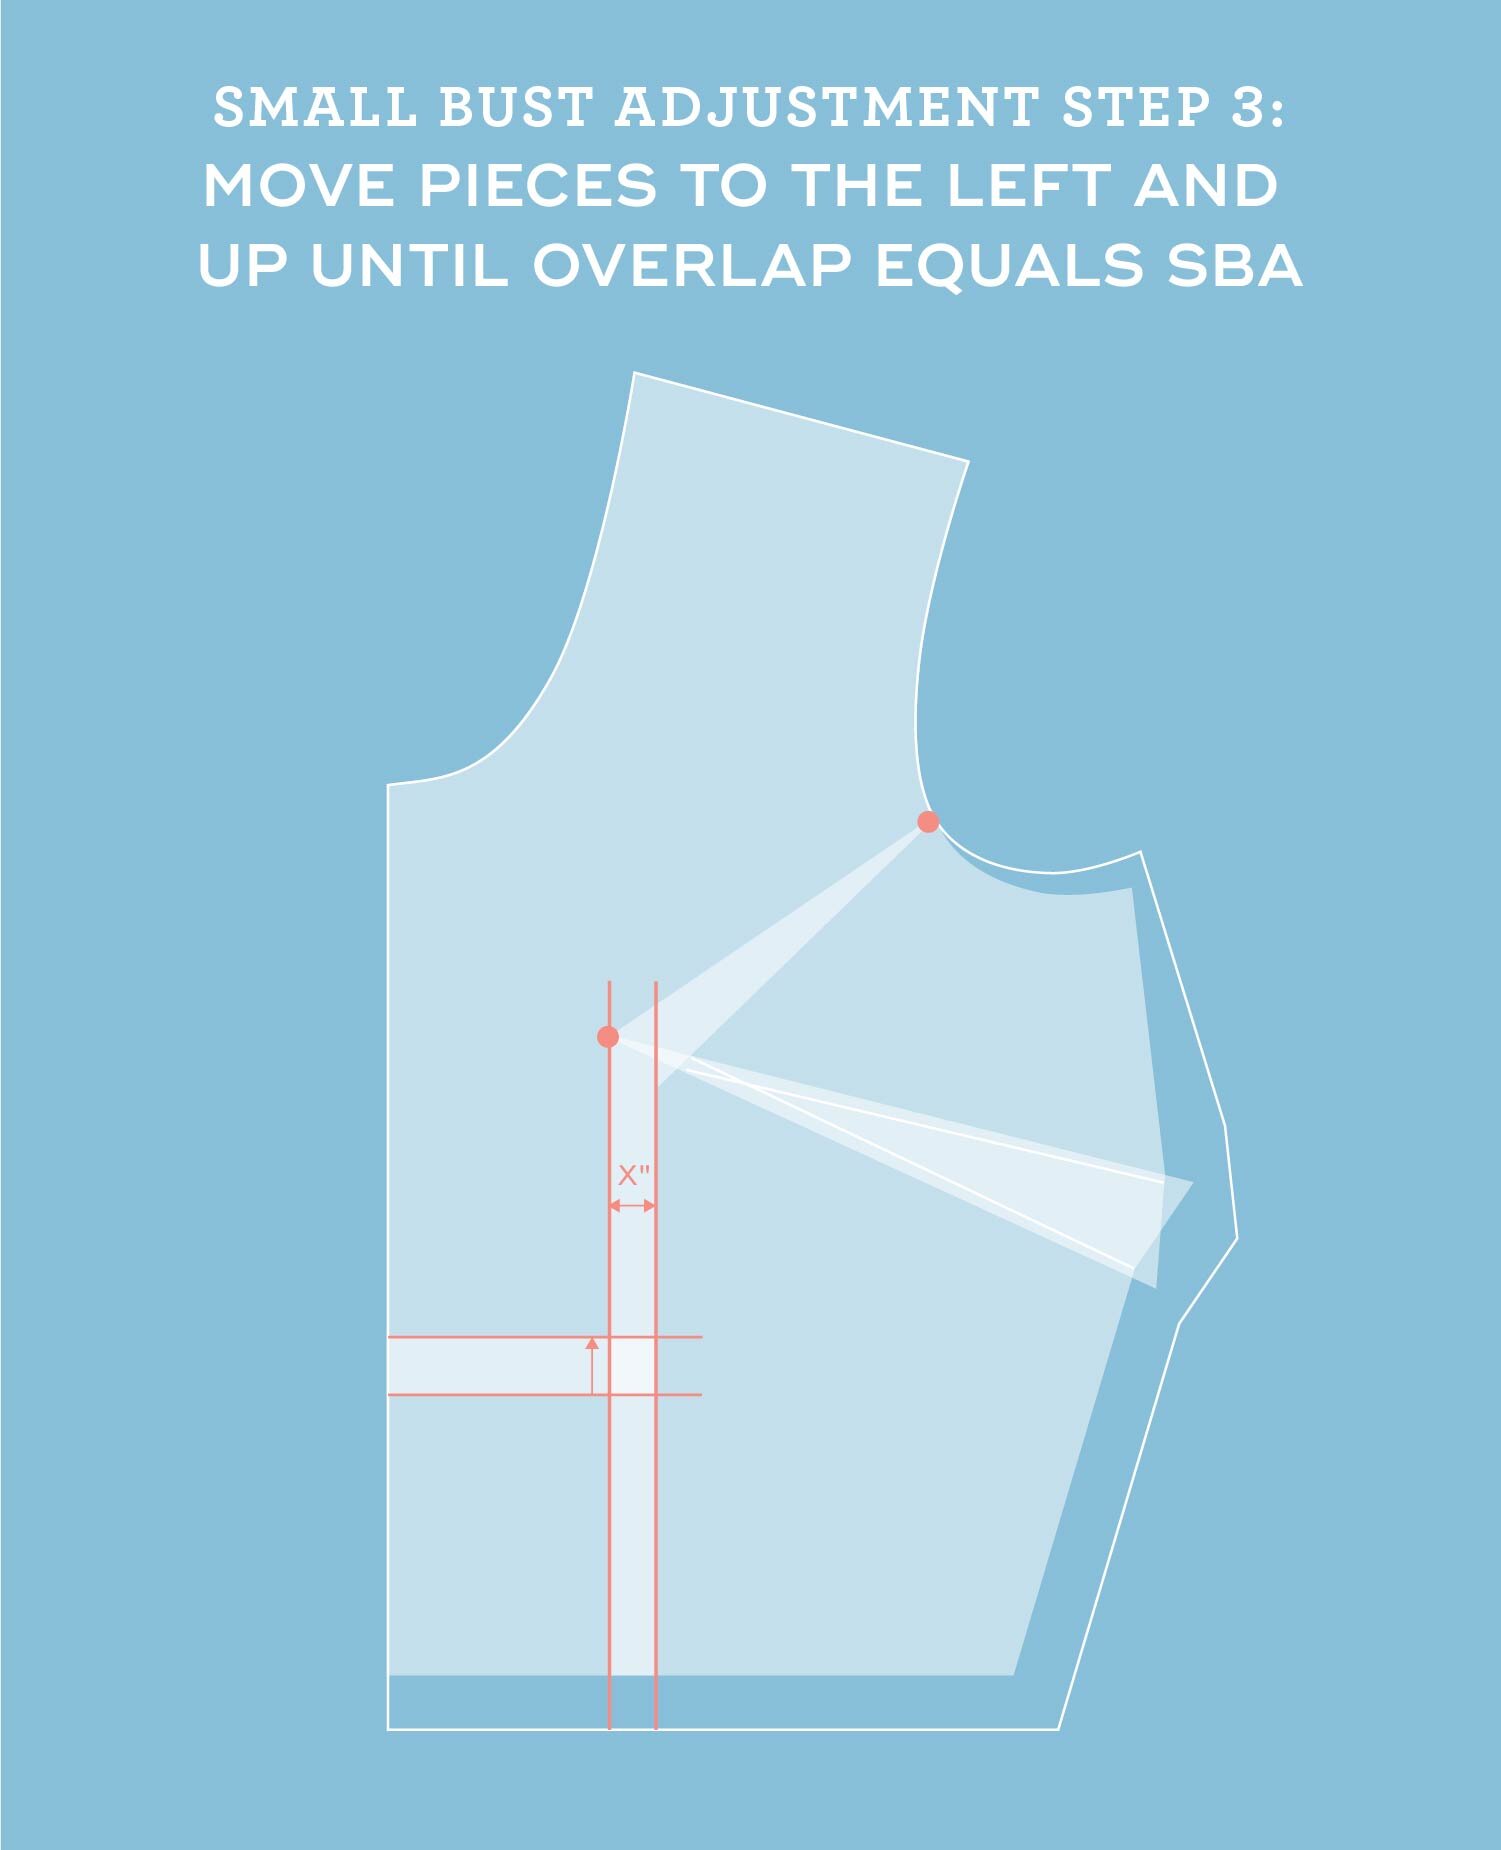
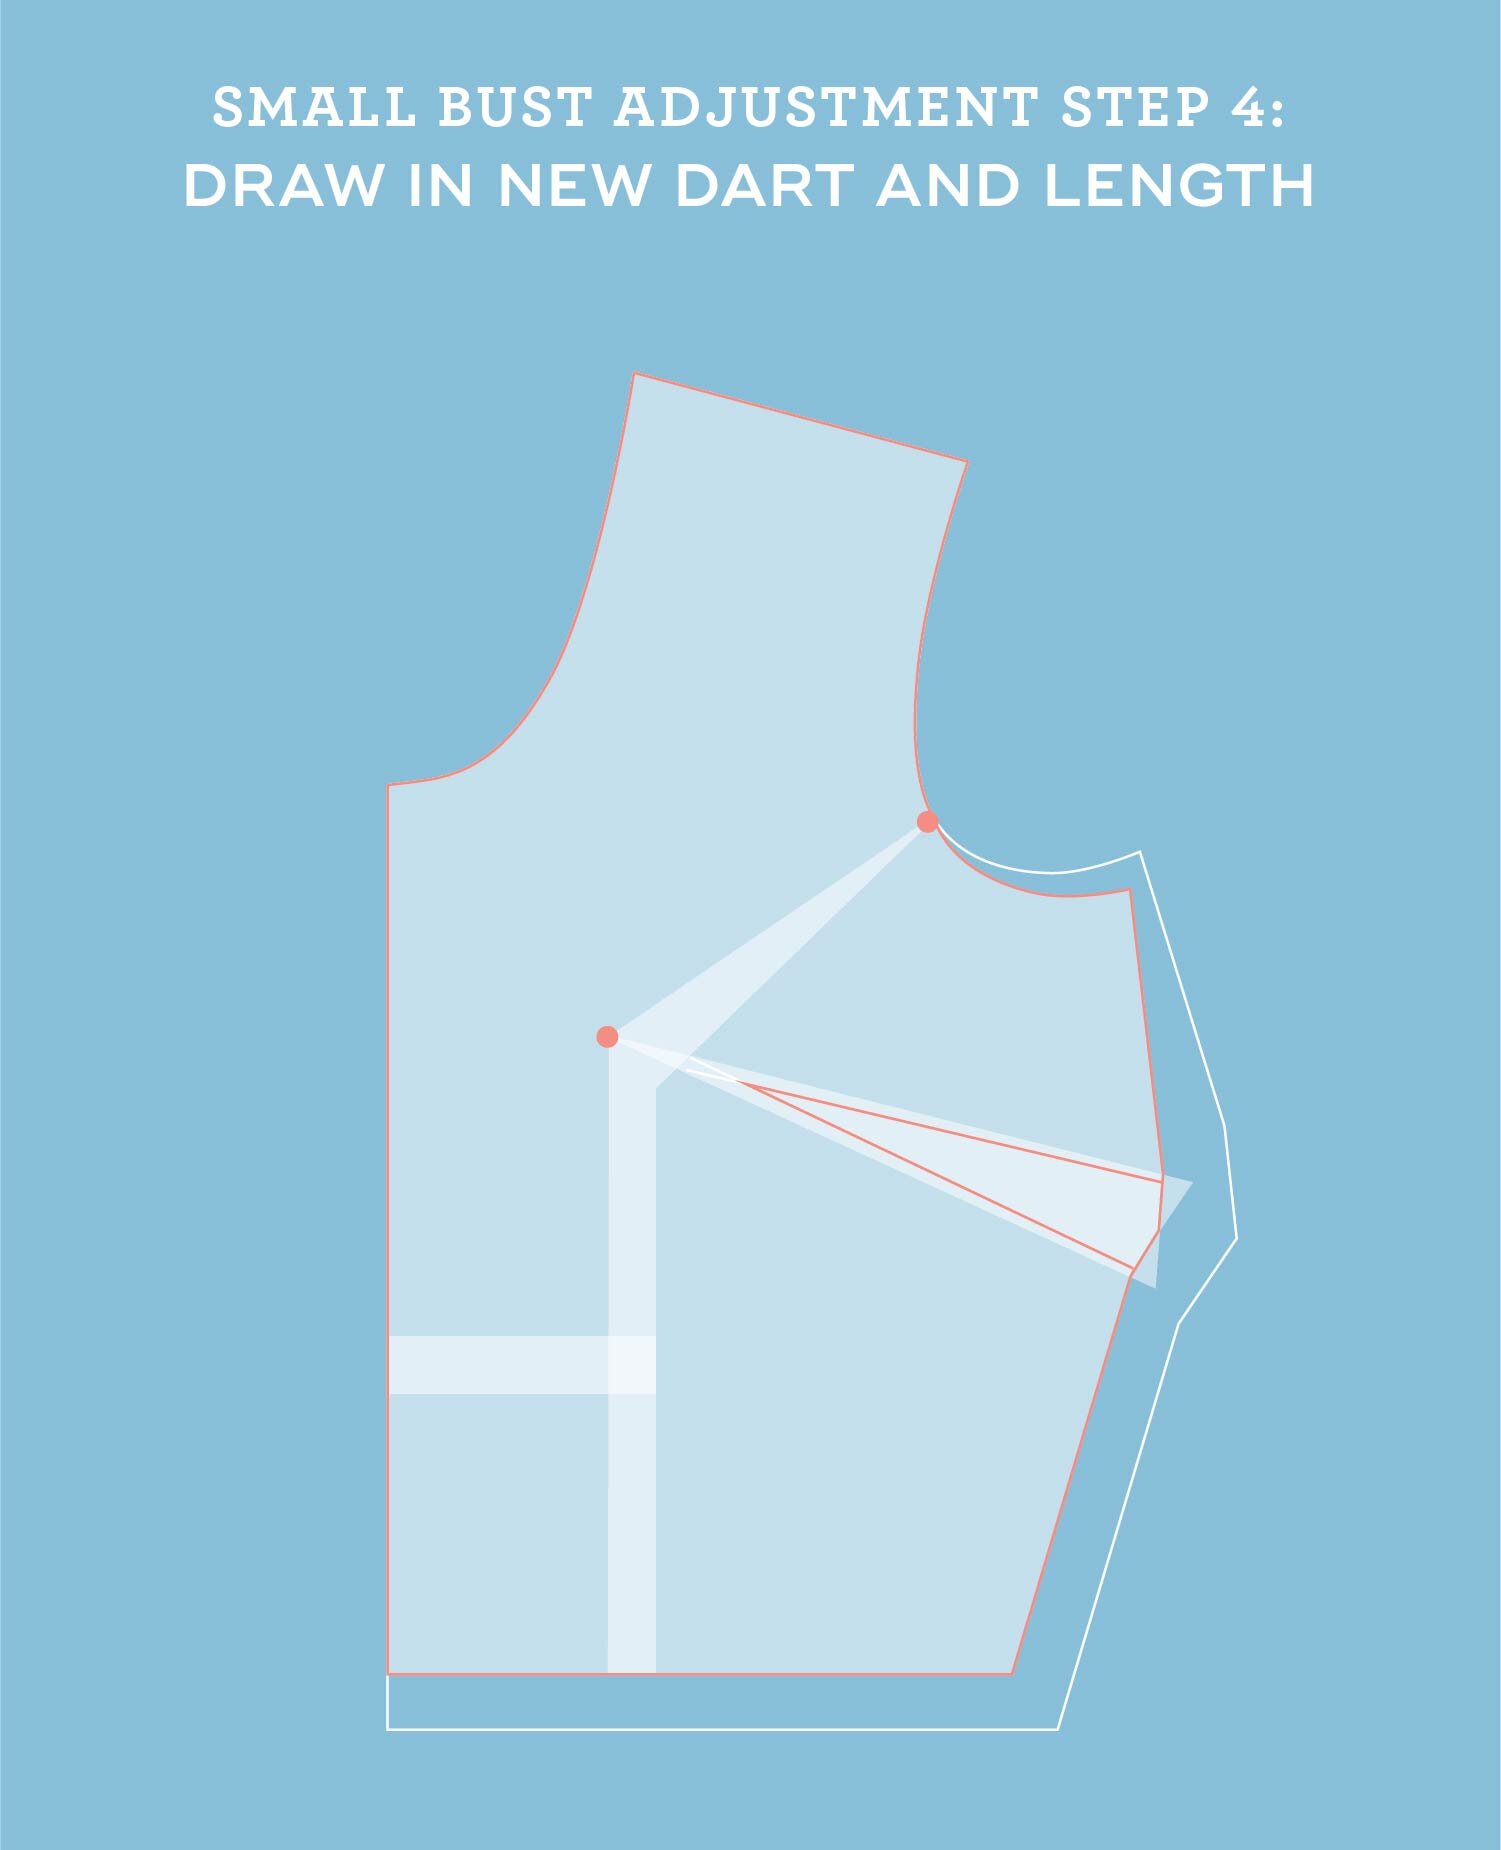
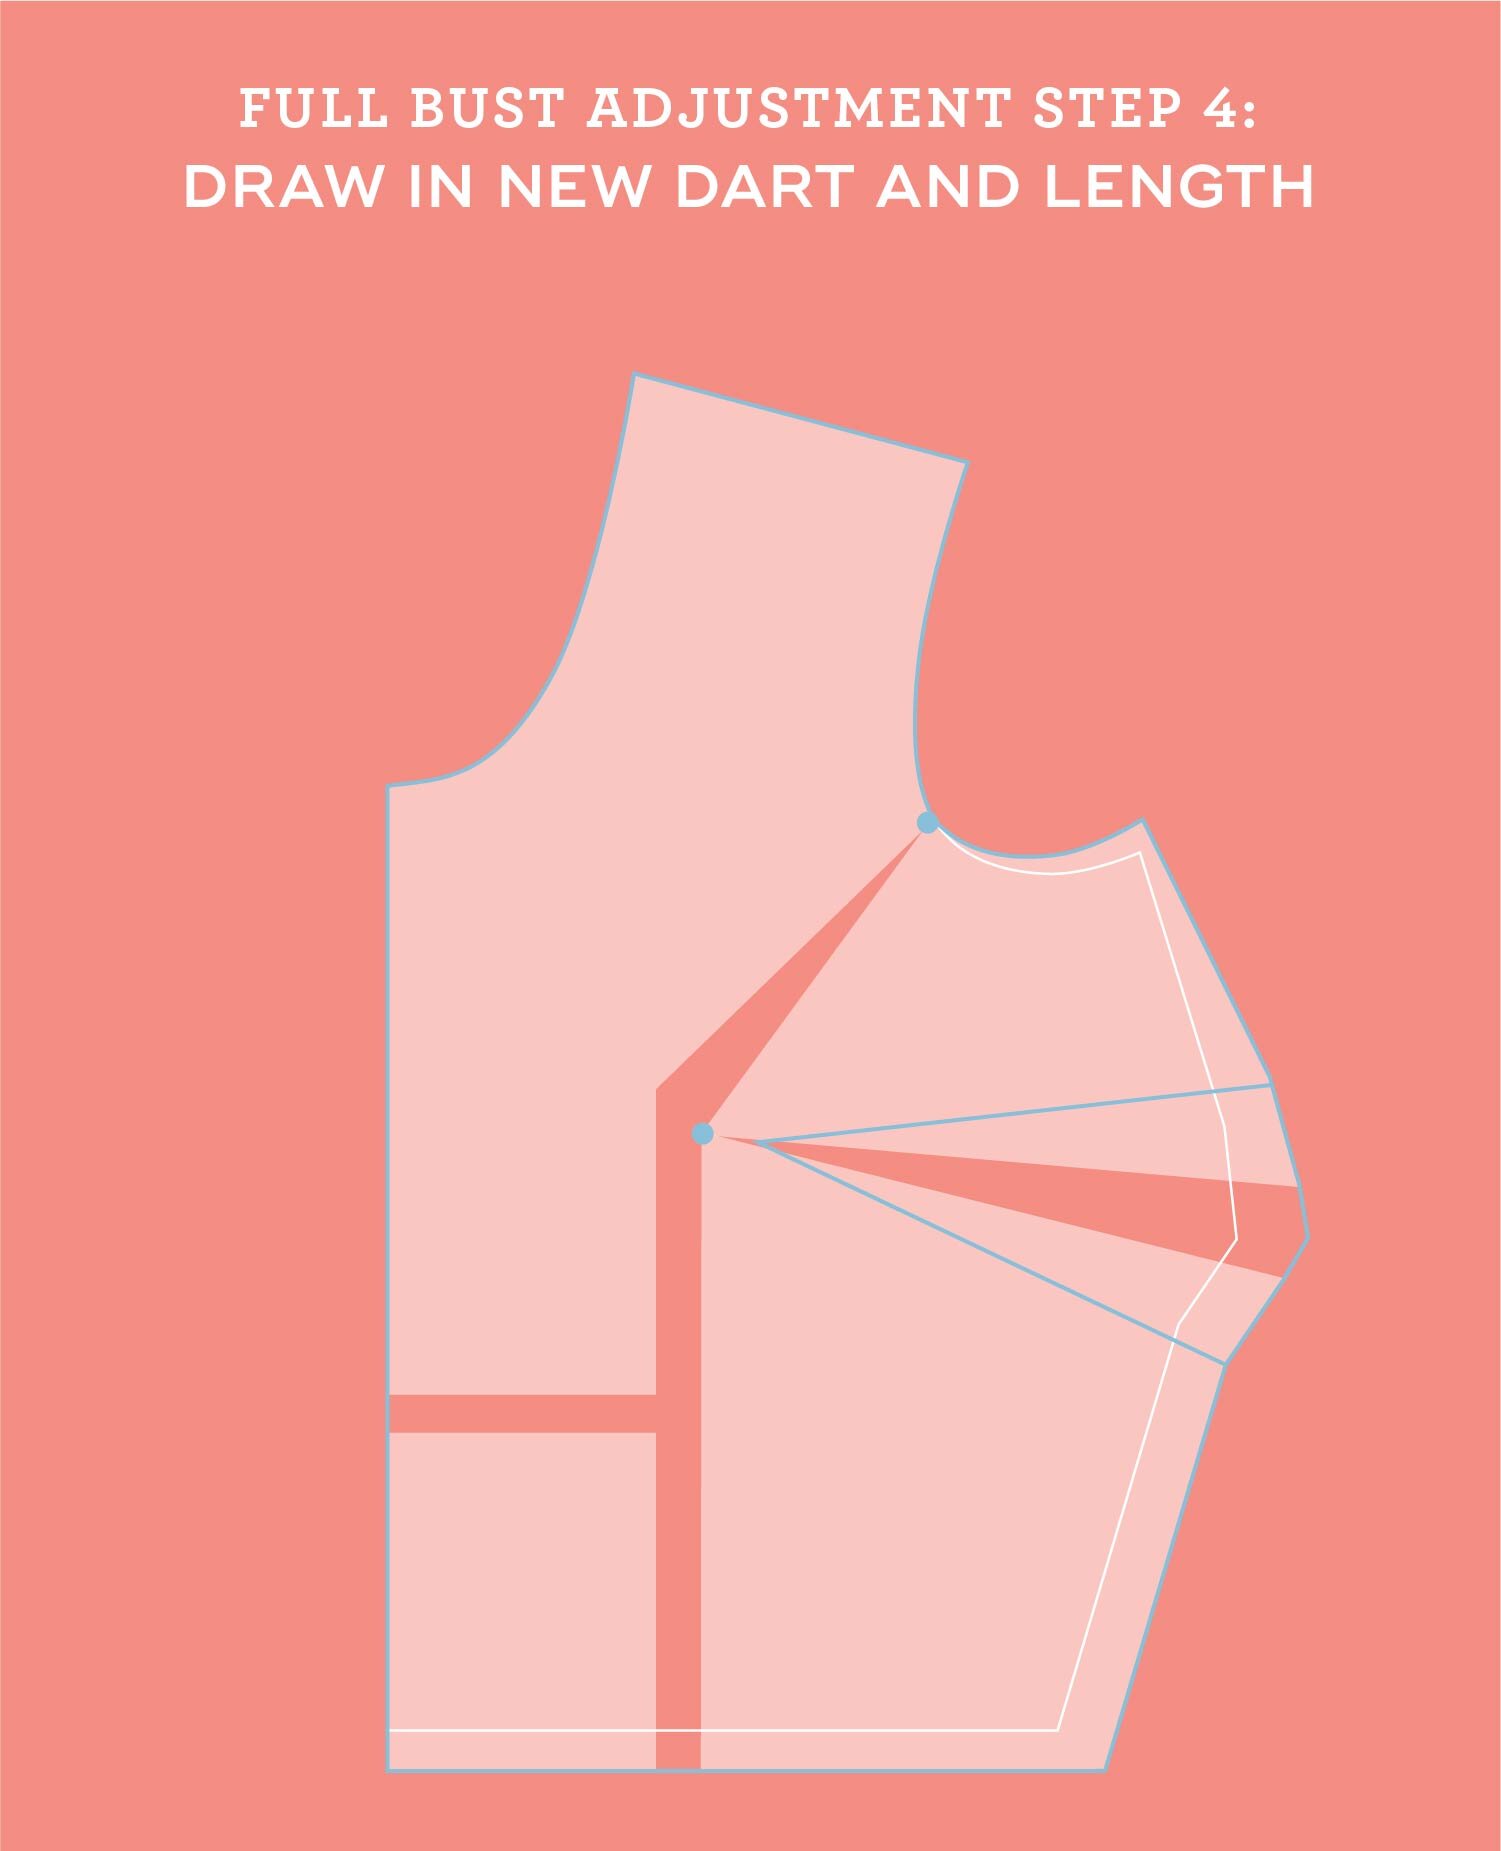
This pattern is designed for a C-cup. If you are an A or B cup, I recommend doing a small bust adjustment (SBA). If you are a D cup or larger then I recommend doing a full bust adjustment (FBA). If you are a D-cup, you may be able to get away without doing an FBA.
How to determine torso length adjustments
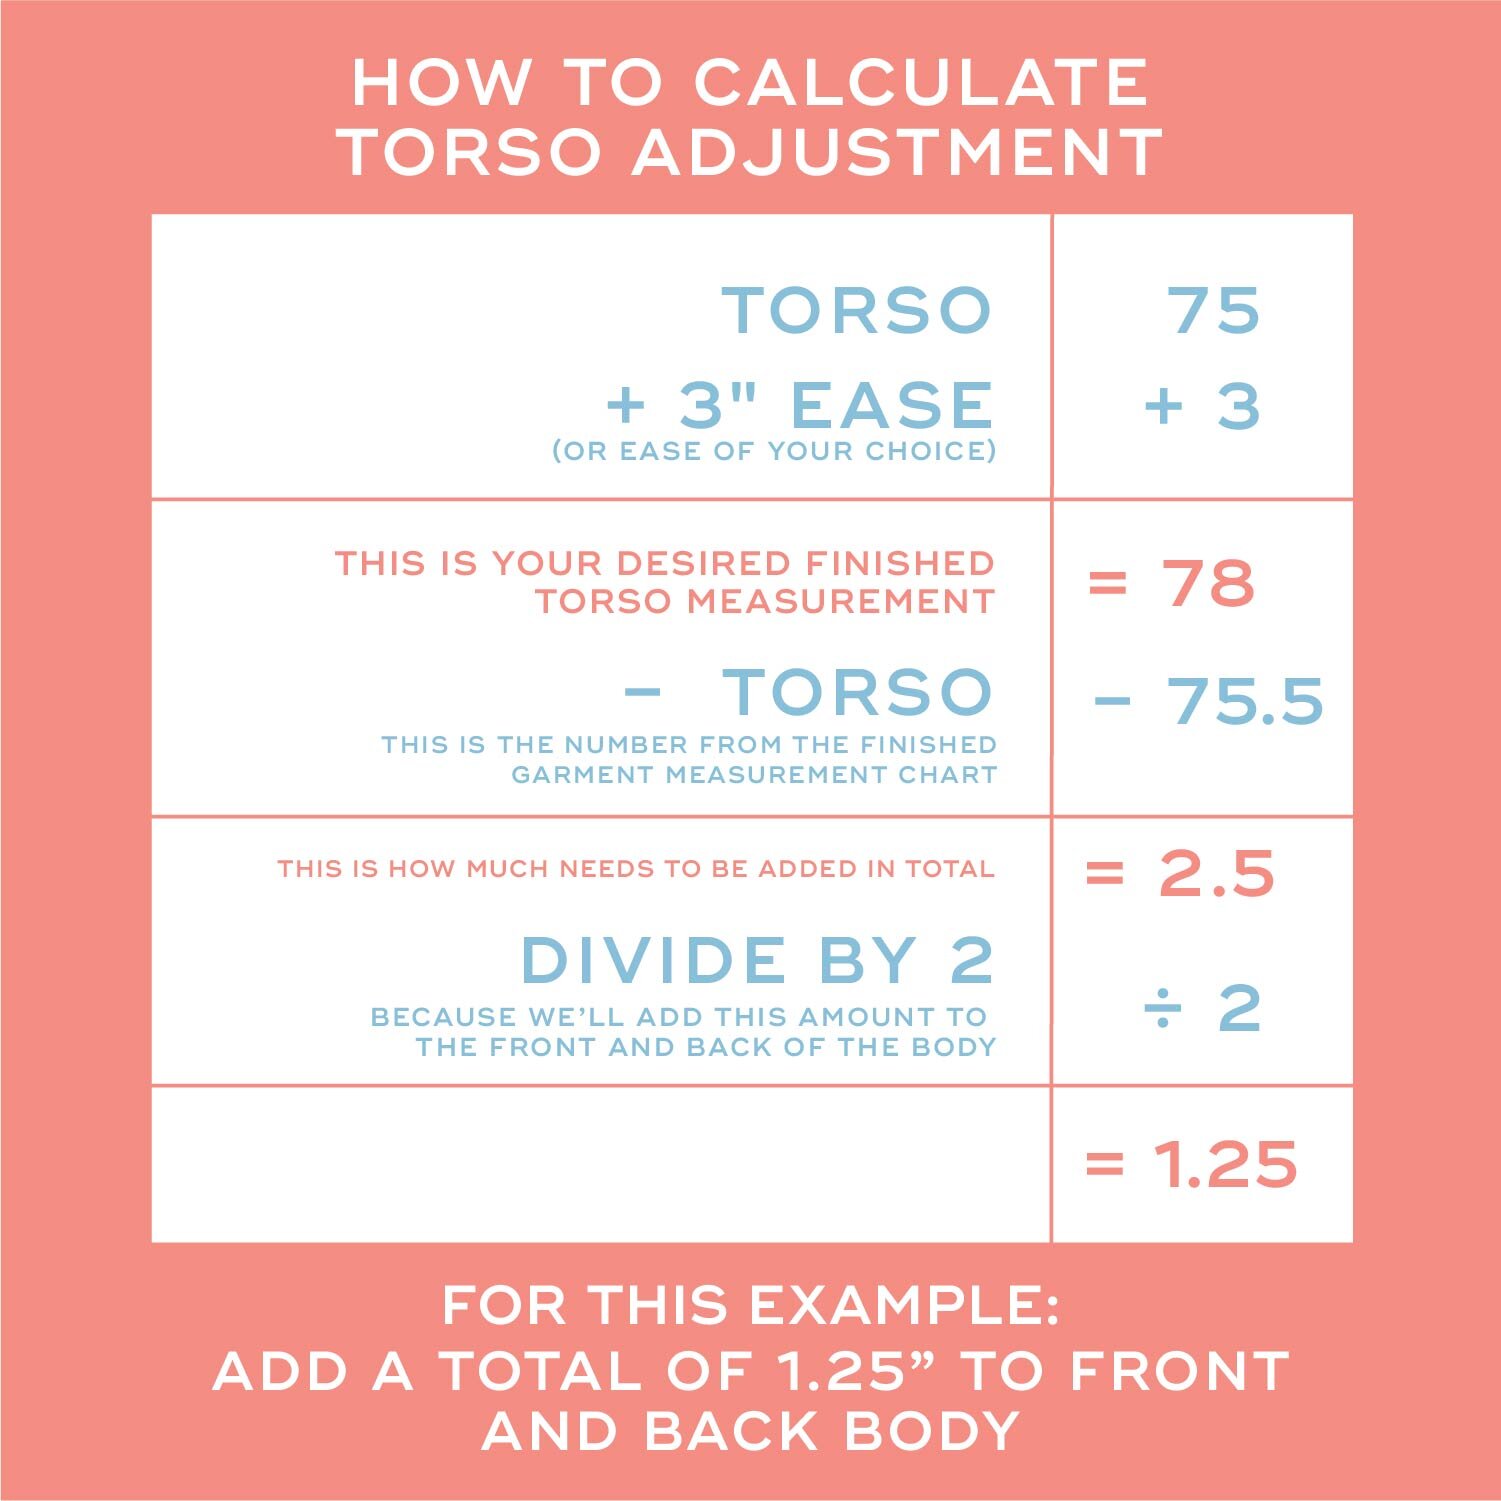
In our example, we have a torso measurement of 75” and the finished measurement for our size is 75.5”. I recommend having at least 3” of torso ease so we’ll need to add 2.5” to the finished garment to get a comfy fit. When you add torso length, you’ll add it evenly to the front and back so we’ll want to add 1.25” in length to the torso. Your personal proportions will determine if you need to add (or subtract) length to the bodice or to the crotch depth. For help altering the crotch depth, check out this post.
Need more help sewing the Dana Jumpsuit?
I’ve developed an online video sewalong (e-course) that takes you through all the steps of making the Dana Jumpsuit from selecting your size and making fit adjustments to sewing an invisible zipper and neckline facing. Along the way, you’ll get all my tips and tricks for getting great sewing results, as well as additional insights into the design and how to make it work for you. You can learn more about the course here.
Additionally, I’ve pulled together a few of my existing tutorials that may be helpful while sewing this pattern. You can check out those resources here. Happy sewing!


